Serving Springfield, MO and Surrounding Areas



 How to Hook Up a Hot Water Heater: Connections & Safety
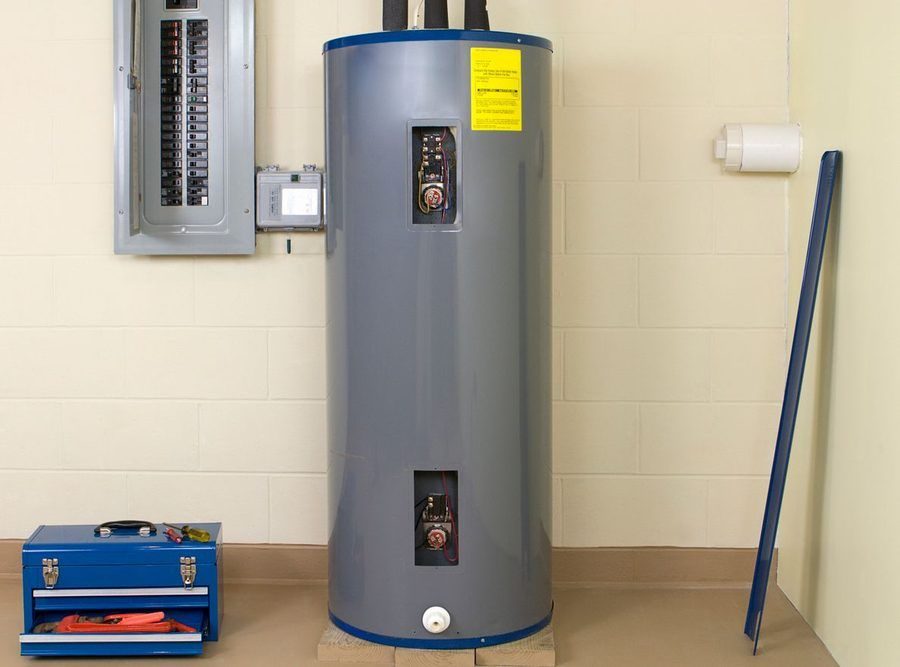
Whether you’re replacing an old water heater or installing a new one, understanding how to hook up a hot water heater can help you prepare for the installation process. A properly connected water heater delivers reliable hot water while helping prevent leaks, equipment damage, and safety hazards.
Hooking up a water heater involves more than connecting a few pipes. You’ll need to account for water supply lines, gas or electrical connections, pressure relief components, and proper system testing.
This guide explains the main steps involved in hooking up a hot water heater, the differences between gas and electric models, and common installation mistakes to avoid.
Important: Water heater installation must follow the manufacturer’s instructions and local building codes. Gas connections, electrical work, and other regulated installation tasks should be completed by qualified professionals.
What Do You Need to Hook Up a Hot Water Heater?
Before starting a water heater hookup, it’s important to understand the components involved and confirm that the replacement unit is compatible with your home’s plumbing and energy supply.
Common tools and materials used during installation include:
- Adjustable wrenches and pipe wrenches
- Approved water supply connectors and fittings
- Pipe cutter and appropriate joining tools
- Drain hose for emptying the existing tank
- Cold water shutoff valve
- Temperature and pressure (T&P) relief valve and approved discharge piping
- Drain pan and expansion tank, where required
- Manufacturer-approved gas or electrical connection materials
The exact materials depend on whether you’re installing a gas or electric water heater, the existing plumbing configuration, and local code requirements.
How to Hook Up a Water Heater: Step-by-Step Overview
The following steps explain the typical process for hooking up a traditional tank water heater. Specific installation requirements vary by model, so always follow the manufacturer’s instructions.
Step 1: Shut Off the Water and Energy Supply
Before disconnecting an existing water heater, the water supply and energy source must be safely shut off.
For an electric water heater, power is turned off at the circuit breaker and the circuit must be verified as de-energized before electrical work begins. Gas water heaters require the gas supply to be shut off and handled according to applicable safety procedures.
The cold water supply valve feeding the heater must also be closed.
Never attempt to disconnect a live electrical connection or gas supply. If you are unsure how to safely isolate the system, contact Reed’s for a licensed professional.
Step 2: Drain and Disconnect the Existing Water Heater
When replacing an existing unit, the old water heater must be drained and disconnected before removal.
A drain hose is typically attached to the tank’s drain valve to direct water to an appropriate drainage location. Once the water has cooled and the tank is safely drained, the water connections can be disconnected.
Gas piping, electrical wiring, and venting must be disconnected by qualified personnel where required.
Water heaters can be extremely heavy, even after draining. Proper lifting equipment and assistance help prevent injuries and damage during removal.
Step 3: Position the New Water Heater
The replacement water heater should be placed on a stable, level surface with adequate clearance for ventilation, servicing, and access to essential components.
Before installation, confirm that:
- The new unit fits the available space.
- Water connections can reach the appropriate fittings.
- Required drainage and safety components can be accommodated.
- The installation location meets the manufacturer’s clearance requirements.
Some installations also require a drain pan, seismic restraints, or additional safety equipment.
Positioning the heater correctly helps simplify the remaining connections and future maintenance.
Step 4: Connect the Hot and Cold Water Lines
One of the most important parts of hooking up a water heater is correctly connecting the water supply lines.
Most traditional tank water heaters have two primary water connections:
Cold Water Inlet: Allows cold water from the home’s plumbing system to enter the tank for heating.
Hot Water Outlet: Delivers heated water from the tank to the home’s faucets, showers, and appliances.
The inlet and outlet are normally identified on the water heater. Connections must use approved materials and follow the manufacturer’s instructions.
Hot and cold connections should never be reversed. Incorrect connections can affect water heater performance and hot water delivery.
After the connections are completed, the system must be checked carefully for leaks.
Step 5: Verify the Pressure Relief Valve and Safety Components
Water heaters include a temperature and pressure (T&P) relief valve that helps protect the tank from dangerous temperature or pressure buildup.
This valve requires properly installed discharge piping to direct released water to a safe location.
The discharge pipe is separate from the home’s hot and cold water supply lines. It must never be capped, blocked, or fitted with a shutoff valve.
Depending on the home’s plumbing configuration, a thermal expansion tank or other pressure-control components may also be required.
These safety components are essential to proper water heater operation and should be inspected during installation.
Step 6: Complete the Gas or Electrical Hookup
Once the plumbing connections are in place, the water heater must be connected to its energy source.
For electric water heaters, this involves confirming the appropriate electrical circuit, wiring, grounding, and overcurrent protection.
Gas water heaters require approved gas connections, appropriate combustion air, and correctly installed venting or exhaust components.
These connections present serious safety risks when installed incorrectly. Qualified professionals should complete the work and perform the required safety checks.
Step 7: Fill the Tank and Test the Water Heater
Before the water heater begins operating, the tank must be completely filled with water and air must be purged from the plumbing system.
Turning on an electric water heater before the tank is full can damage the heating elements, a problem known as dry firing.
Once the system is properly filled and all required safety checks are complete, a qualified installer can start the water heater according to the manufacturer’s instructions.
Final testing should confirm that:
- Water connections are free from leaks.
- The tank fills and heats correctly.
- Safety components are properly installed.
- Gas or electrical components operate safely.
- Hot water reaches the home’s fixtures.
For many households, a water temperature around 120°F is a common starting point, although individual needs and system requirements may differ.
Hooking Up a Gas vs. Electric Water Heater
While gas and electric water heaters use similar water supply connections, their energy hookups have important differences.
Electric Water Heater Hookup
Electric water heaters use heating elements powered by an electrical circuit.
An electric installation requires compatible electrical service, properly sized wiring, appropriate circuit protection, and safe grounding.
The tank must also be completely filled before electrical power is restored.
Improper wiring can create electrical hazards, damage heating elements, or prevent the water heater from operating correctly.
Gas Water Heater Hookup
Gas water heaters use a burner to heat the water inside the tank.
In addition to the water supply connections, these units require correctly sized gas piping, approved fittings, and proper combustion ventilation.
Gas leaks and incorrect venting can create serious hazards, including fire and carbon monoxide exposure.
Because of these risks, gas water heater connections and required testing should be performed by qualified professionals.
Common Mistakes When Hooking Up a Hot Water Heater
Even small installation errors can affect the performance, efficiency, and safety of a new water heater.
Reversing the hot and cold water connections: Incorrect connections can interfere with normal heating and hot water delivery.
Failing to check for water leaks: Loose or improperly installed fittings can lead to water damage and unnecessary repairs.
Incorrect pressure relief valve piping: Blocked, restricted, or improperly routed discharge piping can prevent the safety system from functioning correctly.
Turning on an electric heater before filling the tank: Dry firing can damage the heating elements and may require repairs before the unit can operate.
Improper gas venting or electrical connections: Incorrect hookups can create serious safety hazards and violate applicable building codes.
Ignoring manufacturer instructions: Different water heater models have unique installation and clearance requirements that must be followed.
A professional installation helps address these concerns before the water heater is placed into regular service.
Need Help Hooking Up a Water Heater in Springfield, MO?
Understanding the water heater hookup process can help you recognize what goes into a safe and reliable installation. However, connecting gas or electrical systems and ensuring that safety components meet installation requirements is best handled by experienced professionals.
At Reed’s Plumbing, Excavating, Septic, Heating & Air, we’ve served Springfield, MO, and surrounding communities since 1972. Our team provides professional water heater installation and replacement services to help homeowners enjoy dependable hot water.
Whether you’re replacing an aging tank or exploring a different type of system, our technicians can evaluate your home’s needs and recommend an appropriate solution.
Learn more about our water heater services or contact us online to schedule service.
FAQs
Can You Hook Up a Hot Water Heater Yourself?
Some homeowners may be able to perform portions of a
water heater replacement, depending on local requirements
and their experience. However, gas piping, electrical
connections, venting, and safety components often require
specialized knowledge, permits, or professional installation.
Always confirm local requirements before starting.
How Do You Connect Hot and Cold Water Lines to a Water Heater?
The home’s cold water supply connects to the water
heater’s designated cold inlet, while the hot outlet
connects to the plumbing system supplying hot water
throughout the home. The installer must use approved
fittings, follow the manufacturer’s instructions, and
check the completed connections for leaks.
Can You Hook Up a Gas Water Heater the Same Way as an Electric Water Heater?
No. Although both types require hot and cold water
connections, gas heaters also need fuel piping and
combustion venting, while electric models require an
appropriate electrical circuit. Each type has different
installation and safety requirements.
What Happens if a Water Heater Is Hooked Up Incorrectly?
Improper water heater connections may cause leaks,
insufficient hot water, damaged components, excessive
pressure, or serious gas and electrical hazards. If a
newly installed water heater is leaking, malfunctioning,
or showing signs of unsafe operation, stop using it
and have a qualified professional inspect the system.
Schedule now
Call reed’s today!
Need help with your home systems? Reed’s makes it simple to get the service you need with fast response times and a team that puts your comfort first.